
Tools/parts needed: 10 mm crescent wrench, 10 mm & 13 mm sockets/wrench, replacement battery (see discussion for size) and a cold beer
Approximate time required: 30 min
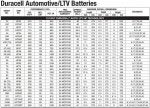
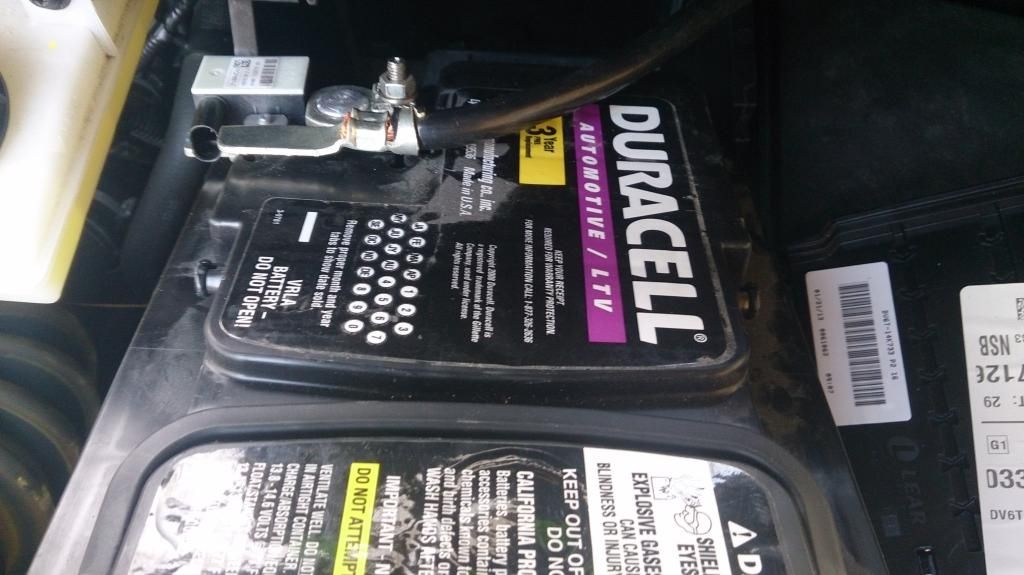
Quick discussion about batteries: All of the 2013 Escapes come standard with a size 96R battery. It's one of the smallest batteries (in terms of cranking amps, reserve capacity, & weight) that you can get [I'm referencing the Duracell Automotive Battery spec sheet - these are the batteries sold at Sam's club].
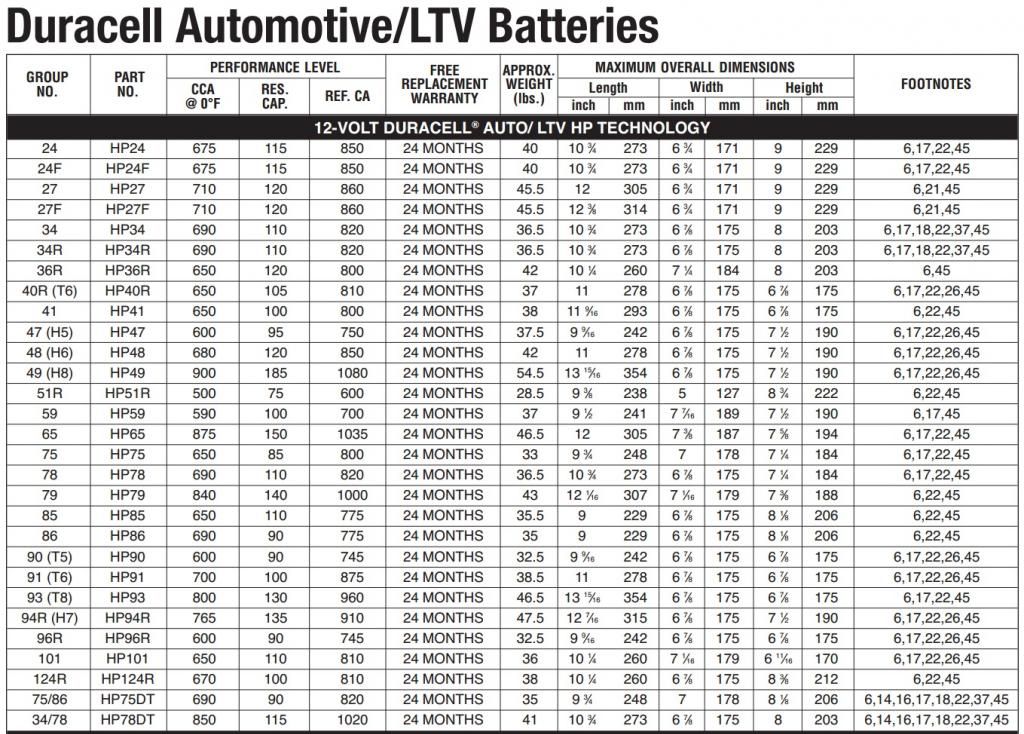
In other words, the stock battery sucks. I assume Ford was saving some money with the 96R battery, but the good news is that the battery tray can accept a larger battery without any cutting, drilling, or any other permanent modifications. And who doesn't want more cranking amps and reserve capacity? Especially if you run a lot of accessories (remote start, tow, lights etc.)
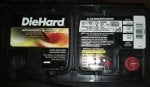
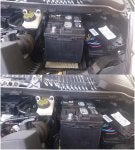
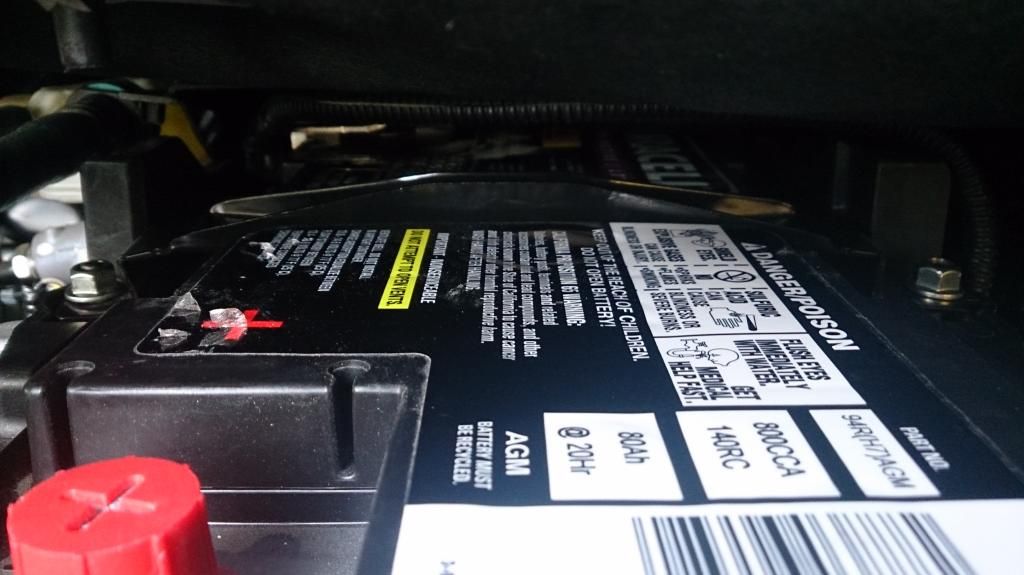
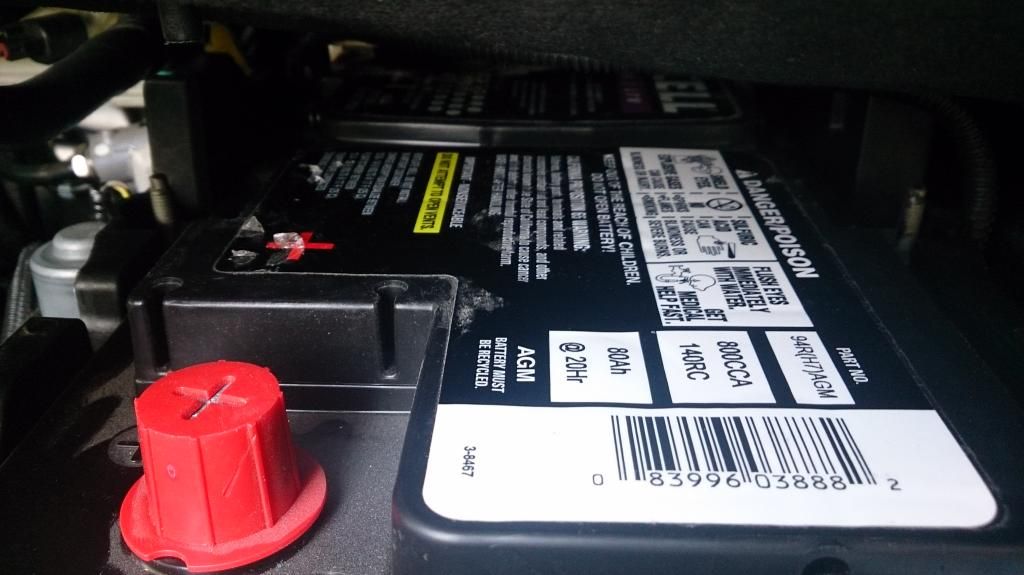
So how big can I go?? The simple answer is that a size 94R (H7) fits without any trouble. See the pictures below for the relative size comparison. I'm using an AGM battery, but a normal flooded battery should fit just the same.

Battery removal/replacement:
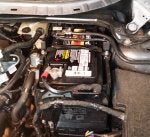
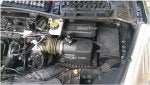
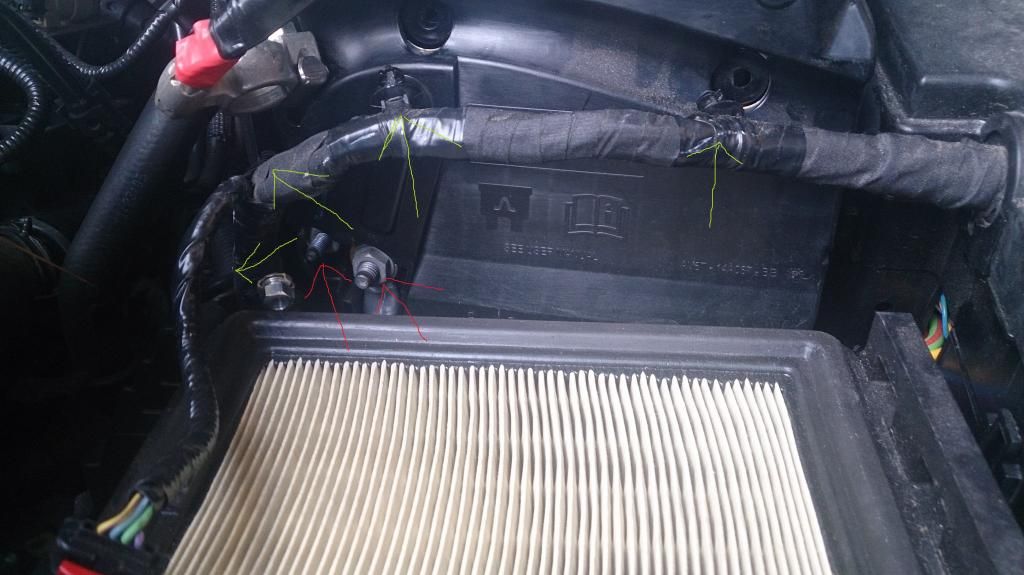
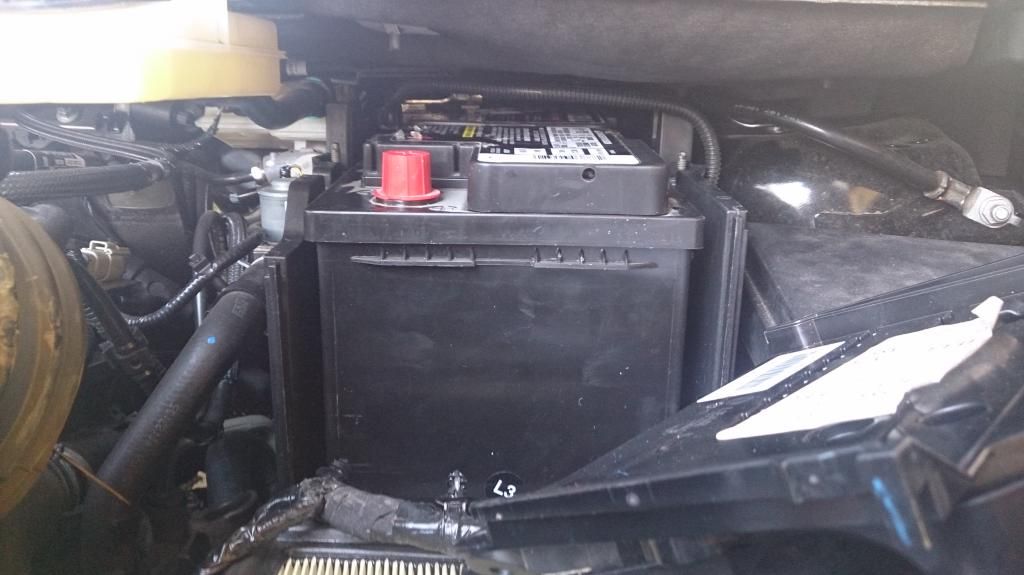
1. Turn off the car and and prop the hood open. Locate the battery cover and air intake which houses the air filter. Remove the battery cover and disconnect the positive wire using a 10 mm wrench. Pop open the air intake as if you were replacing the air filter, but don't remove the air filter. Just disconnect the wire plugged in at the top and move the cover to the left so it's out of the way. (The plug is easily removed by pushing the red plastic piece back with your finger nail about a quarter inch, then pull the entire plug backwards.)

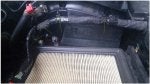
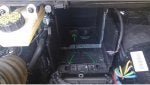
With the air intake out of the way, you should be able to access the 4 black plastic plugs (green arrows in the picture). Pull all four of these plugs out. Now you should be able to lift the front cover of the battery tray about 1 inch so that it has some free movement. With the cover lifted up about 1 inch, you should be able to access the two wires that are attached on the bottom left of the cover (red arrows in the picture). Use a 10 mm socket and a 13 mm socket to remove the nuts and then slide the wires off. I've already removed the 10 mm nut in the picture below. Don't drop the 13 mm nut; it's not attached to the wire like the 10 mm one!
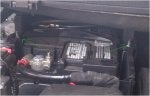
Now you should be able to move the battery tray front cover out the way to the right like this:
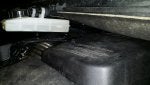
Before we can move the battery, we need to loosen the clamp holding it down. Remove the two nuts that are holding the metal clamp (green arrows in pciture). The bar can then be lifted off the bolts.

Pull the battery forward and lift it over the edge of the tray. Don't worry, the negative wire should be long enough, but keep an eye on the small wire plugged into the negative terminal (green arrow in picture). Don't put excessive tension on this small wire. Now you should have enough room to use your hand to unplug the small wire from the side of the negative terminal. With the small wire out of the way, the battery should come forward all the way, and you can use a 10 mm wrench to remove the negative terminal.

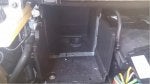
Remove the old battery from the vehicle.
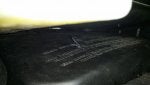
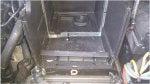
The empty battery tray should look like this. Note the two plastic adapters that Ford added to accommodate the smaller battery (green arrows). Remove both of these plastic pieces. The rear piece easily pops out by hand. The piece in the front needs to be gently pried upwards.
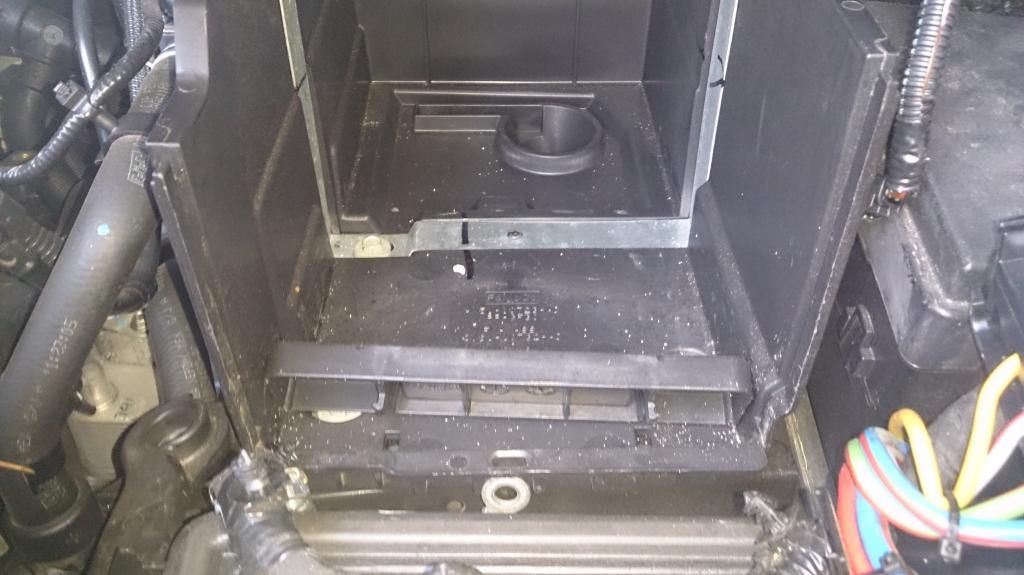
Congratulations! Now your Ford Escape can accept a "real" battery.

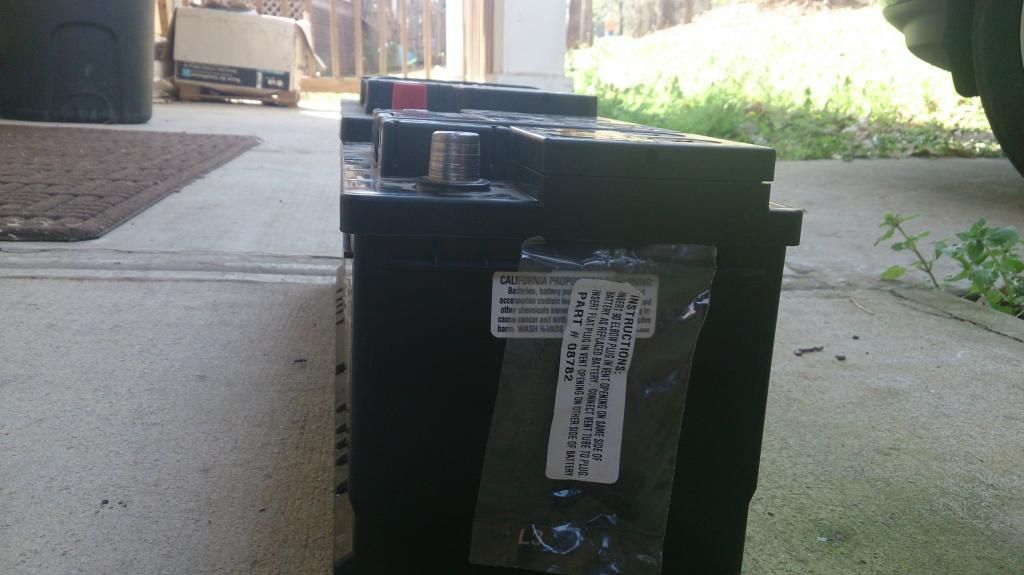
Now get your replacement battery and essentially reverse the process. If you are using the larger 94R (H7) size battery, you may need to remove the handles if it has any so that the metal battery clamp can fit nicely in the center groove. I've included more pictures below of the new battery being installed.

Now that you're finished, you can relax and enjoy the cold beer.
Approximate time required: 30 min
Quick discussion about batteries: All of the 2013 Escapes come standard with a size 96R battery. It's one of the smallest batteries (in terms of cranking amps, reserve capacity, & weight) that you can get [I'm referencing the Duracell Automotive Battery spec sheet - these are the batteries sold at Sam's club].

In other words, the stock battery sucks. I assume Ford was saving some money with the 96R battery, but the good news is that the battery tray can accept a larger battery without any cutting, drilling, or any other permanent modifications. And who doesn't want more cranking amps and reserve capacity? Especially if you run a lot of accessories (remote start, tow, lights etc.)
So how big can I go?? The simple answer is that a size 94R (H7) fits without any trouble. See the pictures below for the relative size comparison. I'm using an AGM battery, but a normal flooded battery should fit just the same.


Battery removal/replacement:
1. Turn off the car and and prop the hood open. Locate the battery cover and air intake which houses the air filter. Remove the battery cover and disconnect the positive wire using a 10 mm wrench. Pop open the air intake as if you were replacing the air filter, but don't remove the air filter. Just disconnect the wire plugged in at the top and move the cover to the left so it's out of the way. (The plug is easily removed by pushing the red plastic piece back with your finger nail about a quarter inch, then pull the entire plug backwards.)

With the air intake out of the way, you should be able to access the 4 black plastic plugs (green arrows in the picture). Pull all four of these plugs out. Now you should be able to lift the front cover of the battery tray about 1 inch so that it has some free movement. With the cover lifted up about 1 inch, you should be able to access the two wires that are attached on the bottom left of the cover (red arrows in the picture). Use a 10 mm socket and a 13 mm socket to remove the nuts and then slide the wires off. I've already removed the 10 mm nut in the picture below. Don't drop the 13 mm nut; it's not attached to the wire like the 10 mm one!

Now you should be able to move the battery tray front cover out the way to the right like this:

Before we can move the battery, we need to loosen the clamp holding it down. Remove the two nuts that are holding the metal clamp (green arrows in pciture). The bar can then be lifted off the bolts.

Pull the battery forward and lift it over the edge of the tray. Don't worry, the negative wire should be long enough, but keep an eye on the small wire plugged into the negative terminal (green arrow in picture). Don't put excessive tension on this small wire. Now you should have enough room to use your hand to unplug the small wire from the side of the negative terminal. With the small wire out of the way, the battery should come forward all the way, and you can use a 10 mm wrench to remove the negative terminal.


Remove the old battery from the vehicle.
The empty battery tray should look like this. Note the two plastic adapters that Ford added to accommodate the smaller battery (green arrows). Remove both of these plastic pieces. The rear piece easily pops out by hand. The piece in the front needs to be gently pried upwards.


Congratulations! Now your Ford Escape can accept a "real" battery.

Now get your replacement battery and essentially reverse the process. If you are using the larger 94R (H7) size battery, you may need to remove the handles if it has any so that the metal battery clamp can fit nicely in the center groove. I've included more pictures below of the new battery being installed.


Now that you're finished, you can relax and enjoy the cold beer.